
Knowing the spotlight effect can lift your work to a new level. This is true in photography and design. Whether for TV shows, concerts, or theaters, It can boost your projects to new heights. Whether you’re a photographer or a designer, understanding how to use the spotlight effect is key. This technique can draw attention to specific parts of an image. It makes a striking composition. It can highlight a subject in a portrait. It can also emphasize a key feature in a graphic design. The spotlight effect is a powerful tool in your creative arsenal.
Let’s learn how to use Photoshop’s spotlight effect.
Pro Tips: Use Photoshop CS6 or later for improved results.
1st Step: Opening and Importing Your Image into Photoshop
To start setting up your image in Photoshop, you first need to open the program and import your desired image.
Simply click on “File” in the top menu, then select “Open” to choose the image file from your computer.
(For Windows: Use the keyboard shortcuts Ctrl + O at the same time,
For Mac: Use the keyboard shortcuts Command + O at the same time)
Once the image is open in Photoshop, you can begin making adjustments and enhancements to bring your vision to life.
Tips on Choosing the Right Image for the Spotlight Effect
When selecting an image for the spotlight effect, it’s important to choose one with a clear subject or focal point. Images with a strong contrast between light and dark areas work well for this effect. It helps to highlight the subject and create a dramatic impact. Also, simple, uncluttered backgrounds in images will make it easier to isolate the subject. Then, the spotlight effect can be applied effectively. Explore different images to see which ones work best for the look you want to achieve in your final design.

2nd Step: Applying the Lightning Effects Filter in Photoshop
Filter > Render > Lighting Effects. To achieve nuanced lighting effects within your image, navigate to the Filter menu. Within this menu, locate the Render submenu.
Here, selects the option labeled Lighting Effects (A gold mine for light management)

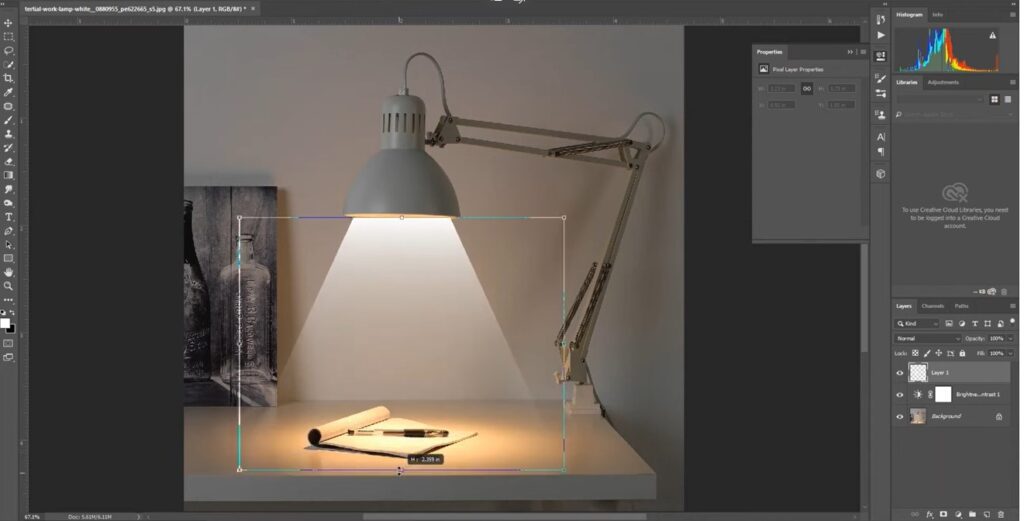
3rd Step: Selecting the spotlight area
When creating a spotlight effect in Photoshop, it is crucial to carefully select the area where you want the spotlight to be focused. This selection will determine the overall impact and effectiveness of the final image.
By using the selection tool in Photoshop, you can easily outline the spotlight area with precision and control.
- To begin, select the desired layer. Next, choose the selection tool that best fits the shape of the spotlight area you want to create. For example, if you are working with a circular spotlight, the elliptical marquee tool would be ideal. The shortcut to activate the Elliptical Marquee Tool on Windows and Mac is the same: M. Pressing “M” will activate the Elliptical Marquee Tool or cycle through the marquee tools (rectangular and elliptical) based on your Photoshop settings.
- Pressing “M” once should bring up the Elliptical Marquee Tool. If not, press it again or hold “Shift” while pressing “M” to cycle through the marquee tools. Do this until you see the elliptical selection cursor.
- Simply click and drag the tool to create a selection around the area where you want the spotlight effect to be focused.
- Once you have outlined the spotlight area. You can fine-tune the selection by adjusting the feathering and opacity.
- Feathering blends the selection’s edges into the image. It does this seamlessly, while also reducing their opacity. It can create a subtle spotlight effect.
- Take the time to investigate these settings until you achieve the desired result.
- After you have perfected the selection, you can proceed to apply the spotlight effect to the area.
- This can be done by adjusting the brightness and contrast, adding a gradient overlay, or applying a spotlight filter. The key is to enhance the selected area while maintaining a natural and realistic look. Remember to keep the spotlight focused on the subject or object you want to highlight.
4th Step: Enhancing Your Image with Filters and Adjustment Layers
After applying the spotlight effect, you can improve your image more. Do this by using filters and adjustment layers in Photoshop. Experiment with different filters such as blur or sharpening to add depth and dimension to your image. You can also use adjustment layers. They let you fine-tune the colors, brightness, and contrast of your image. This creates a more polished and pro look.
Final Step: Saving and exporting your image in Photoshop.
One of the most crucial steps in creating and preserving your work is saving and exporting your image in various file formats. This ensures that your spotlight effect remains intact and can be easily accessed and shared in the future.
This guide will walk you through saving your work in different file formats. This will keep the quality and integrity of your spotlight effect.
(For Windows: Use the keyboard shortcuts Ctrl + Shift + S at the same time,
For Mac: Use the keyboard shortcuts Command + Shift + S at the same time)
When saving your image, it is important to consider the file format that best suits your needs.
For preserving the spotlight effect and maintaining high image quality, the recommended file format is PNG. PNG files support transparency and are great for images with intricate details like the spotlight effect.
- To save your image as a PNG file, simply go to File > Save As and select PNG as the file type.
- You need to share your image with others or upload it to the web. JPEG is a common file format. It compresses well without hurting image quality much.
- To save your image as a JPEG file, follow the same process as saving it as a PNG file but select JPEG as the file type. Remember, JPEG files do not support transparency. So, if your spotlight effect has transparent elements, use PNG. For more advanced editing and manipulation of your image, consider saving it as a PSD (Photoshop Document) file. PSD files keep layers, masks, and more editing features. They let you change your spotlight effect later.
- To save your image as a PSD file, go to File > Save As and select PSD as the file type. This is particularly useful if you plan on revisiting and fine-tuning your spotlight effect later on.
In addition to saving your image in different file formats, it is also important to export your image for different purposes.
For example, if you are creating a print version of your image, make sure to export it in CMYK color mode for accurate color reproduction. On the other hand, if you are uploading your image to the web, export it in RGB color mode for optimal display on screens. Always consider the intended use of your image when exporting it to ensure the best results. Follow these guidelines and tips. They will help you save and export your image with the spotlight effect. After that, you could utilize it later.

Method 2.0
Adding the Spotlight Effect in Photoshop/Photoshop CS6
Making a realistic spotlight effect in Photoshop can improve your images. It may highlight particular issues. In this tutorial, we will demonstrate how to use the gradient tool to achieve this effect. Let’s see how to utilize the spotlight effect in Photoshop with the following article.
Step 01:
Select the area of the image where you want the spotlight effect to be applied. This might be a person, an item, or a scene inside the frame. Make sure to use the lasso tool or selection tool to precisely outline the area.
Step 02:
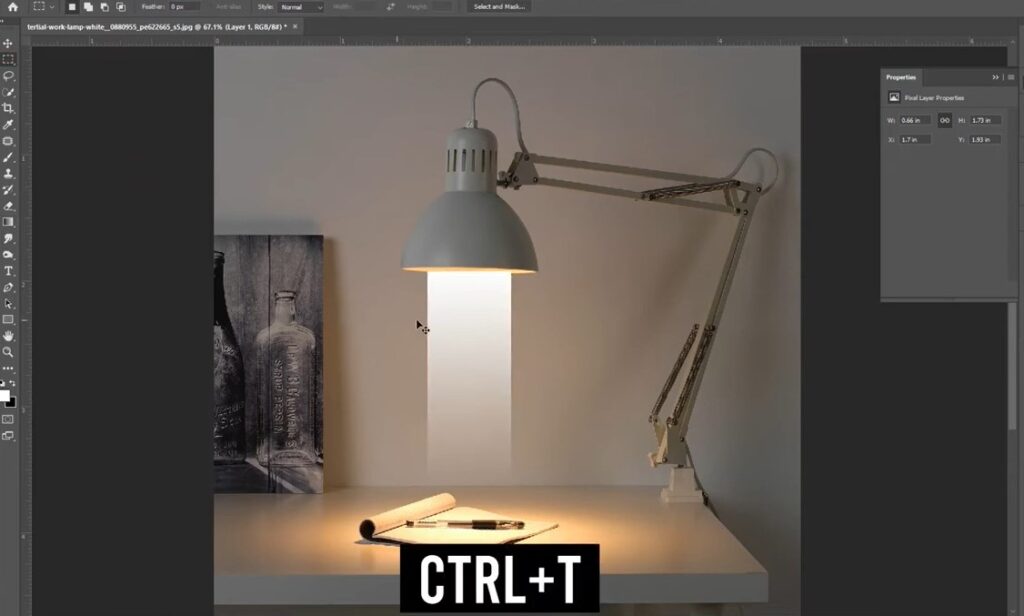
Next, go to the gradient tool in the toolbar and choose a white to transparent gradient. Adjust the size and shape of the gradient tool to fit the selected area. This will create a smooth transition from the spotlight area to the rest of the image.
Step 03:
Apply the gradient tool to the selected area by clicking and dragging from the center of the spotlight outward. You can go further with different angles and intensities to achieve the desired spotlight effect. Remember to keep the gradient subtle for a more realistic look.
Step 04:
For even more control and a more realistic spotlight shape, we will apply a layer mask. Do this after making a smooth gradient overlay for your spotlight effect (Steps 1-3).
- Find the Layer Mask Button: In the Layers panel, which is often located on the workspace’s right side, locate the “Add Layer Mask” button when your gradient layer is chosen. (It appears to be a rectangle with a negative symbol inside. Press this button) When you do this, your gradient layer thumbnail gets a new layer mask thumbnail next to it.
- Creating the Spotlight (Using Black Brushstrokes): From the toolbar, choose the Brush tool (it resembles a paintbrush). Select a delicate brush and use black for the foreground. Now, to conceal undesirable portions of the lighting gradient, gently paint over the black areas of the mask thumbnail. Consider removing the mask to reveal the desired spotlight shape.You can quit the mask editing mode by pressing “Esc” whenever you’re satisfied with your spotlight effect. With that in mind. Mastering the gradient tool in Photoshop can help you create stunning spotlight effects. They improve the pictures’ aesthetic attractiveness. Discover the possibilities with different techniques and settings to achieve the desired look. It’s true that practice makes perfect, so don’t be scared to take risks and explore the limits of your creativity.
Pro Tips for Troubleshooting Spotlight Effects in Photoshop/Photoshop CS6
With Photoshop, you can create amazing visual effects with ease. Uneven lighting and blurry/soft edges are two of the most common problems that can arise when creating this effect. Luckily, there are simple solutions. They can help troubleshoot these issues and make a professional spotlight effect in Photoshop.
- Uneven lighting is a common problem that can occur when creating a spotlight effect in Photoshop. This issue often arises when the light source is not positioned properly or when the intensity of the light is not uniform. To fix this problem, try moving the light source. Also, try different lighting settings to spread the light more evenly. Also, use a soft brush with low opacity. It can help blend the light well and create a natural spotlight effect.
- Soft edges are another common issue that users may encounter when creating a spotlight effect in Photoshop. This problem is often caused by using a brush with a hard edge or by applying too much blur to the edges of the spotlight. To resolve this issue, try using a soft brush with feathered edges to create a more gradual transition between the light and dark areas. Also, adjusting the blur and opacity of the brush can help. This creates sharper, more clear edges for a clean spotlight effect.
- The lighting is uneven, and the edges are blurry. You may also have color accuracy issues. This can happen when creating a spotlight effect in Photoshop. To match the spotlight’s colors to the image, sample colors from the image with the eyedropper tool. Then, apply the sampled colors to the spotlight. You can also adjust the hue and saturation of the spotlight layer. This can help blend the colors better and make a more natural-looking effect.
- Beginners may encounter a common problem. It is pixelation or distortion in the light source. They happen when it creates a spotlight effect in Photoshop. This issue often occurs when the light source is scaled too large or when the resolution of the image is too low. To fix this problem, try resizing the light to a better size. Also, increase the image’s resolution before adding the spotlight effect. This can help prevent pixelation and distortion. It creates a sharper, high-quality spotlight. In short, fixing common issues is key. This step is important when making a Photoshop spotlight effect.
Video tutorial: On top of that you can also watch a short video Tutorial.
Conclusion
Mastering the spotlight effect in Photoshop opens up a world of creative opportunities for designers. By trying different techniques and styles, you can make unique designs. They will surely stand out. Don’t be afraid to push the boundaries and think outside the box to truly showcase your artistic abilities. What spotlight effect technique are you excited to try next in your designs? Let me know in the comments below!