
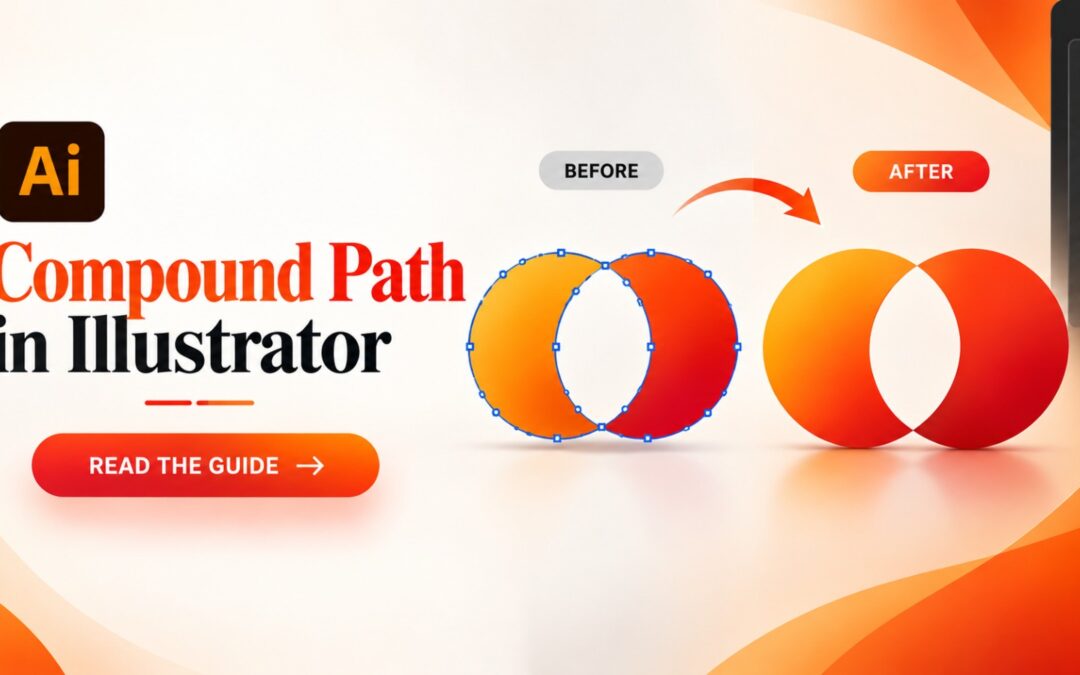
A compound path in Illustrator combines two or more paths into one editable object and uses overlapping areas to create transparent holes. It differs from a group because its subpaths share one appearance and can form cutout areas inside the object.
Illustrator uses fill rules and path direction to decide which areas remain filled and which become holes. The Non-Zero Winding and Even-Odd rules handle overlapping paths in different ways, giving you control over complex shapes.
You can create a compound path by selecting multiple paths and choosing Object > Compound Path > Make or using Ctrl+8 on Windows and Cmd+8 on Mac. You can also release it later with Object > Compound Path > Release when you need to edit the paths separately.
Compound paths differ from groups and compound shapes in how they handle editing, appearance, and underlying objects. A group keeps objects independent, while a compound path combines their path structure, and a compound shape preserves more live editing control.
Designers use compound paths to create holes, build logos, preserve letter counters, make multi-boundary clipping masks, and manage complex vector artwork. A donut shape, outlined letter, or cutout logo shows how the same path mechanics solve different design needs.
Understanding path direction, fill rules, Make, and Release gives you better control over compound paths. Master these core tools, and you can build cleaner holes, logos, typography, masks, and other precise vector artwork with confidence.
What Is a Compound Path in Illustrator?
A compound path in Illustrator combines two or more separate paths into one editable object. Overlapping areas become transparent holes based on a fill rule. Illustrator treats the combined shapes as a single unit in the Layers panel and Selection tool.
A compound path always contains at least two subpaths. Each subpath keeps its own anchor points and curve data, but Illustrator no longer treats the subpaths as independent objects once they merge. The Selection tool grabs the whole compound path in one click, not the individual pieces.
The merged object behaves like a group in one respect: it moves, scales, and rotates as a single unit. It differs from a group in a critical way — a compound path can punch transparent holes where its subpaths overlap, and a standard group cannot.
Holes are the defining feature of a compound path. Where two subpaths overlap, Illustrator removes the fill from that overlap area and shows whatever sits behind the object — the background, another shape, or an image placed underneath.
A donut shape demonstrates the concept directly. Draw a large circle, draw a smaller circle centered inside it, select both, and combine them into a compound path. The inner circle stops being a solid shape and instead cuts a hole through the middle of the outer circle.
Illustrator uses compound paths because vector objects need a way to represent nested, disconnected, or hollow geometry within one editable path. Letters with counters, cutout logos, and multi-piece clipping masks all require this single-object, multi-hole structure to function correctly.
How Do Compound Paths Work?
Compound paths work by applying a fill rule to overlapping paths. Illustrator calculates path direction and counts path crossings to decide which areas stay filled and which become holes. The non-zero winding rule and the even-odd rule produce different results.
Every path in Illustrator has a direction clockwise or counterclockwise. Paths drawn with the Pen or Brush tool take the direction you draw them in. Shape tools like the Ellipse and Rectangle default to a counterclockwise direction. Path direction becomes visible and important only after paths combine into a compound path.
Illustrator determines fills and holes with a fill rule, and it offers exactly two:
- Non-Zero Winding Fill Rule. Illustrator draws an imaginary ray from a point to infinity and tracks a running count of path crossings, adding one for each left-to-right crossing and subtracting one for each right-to-left crossing. A final count of zero marks the point as a hole; any other count marks it as filled. This rule depends on path direction, so reversing one subpath’s direction changes which areas fill.
- Even-Odd Fill Rule. Illustrator counts path crossings along the same imaginary ray without regard to direction. An odd number of crossings marks the point as filled; an even number marks it as a hole. This rule ignores path direction entirely, which makes it more predictable with three or more overlapping subpaths.
When you first combine objects with Object > Compound Path > Make, Illustrator applies the non-zero winding rule by default and reverses the direction of the bottommost object. That reversal is what turns the bottom shape into the visible hole-maker in most simple compound paths.
Switch between the two rules through the Attributes panel:
- Select the compound path with the Selection tool.
- Open Window > Attributes to reveal the fill-rule buttons.
- Click either the Non-Zero Winding Fill Rule button or the Even-Odd Fill Rule button to change how the overlaps render.
How Do You Create a Compound Path in Illustrator?
You create a compound path in Illustrator by selecting two or more paths, then choosing Object > Compound Path > Make, or pressing Ctrl+8 (Cmd+8 on Mac). Illustrator merges the selection into one object and shows a single entry in the Layers panel.
- Select two or more paths with the Selection tool. The paths do not need to overlap, though overlapping paths are what produce visible holes.
- Arrange the paths in the stacking order you want, since the bottommost object supplies the fill, stroke, and style attributes for the entire compound path.
- Choose Object > Compound Path > Make from the top menu, or right-click the selection and choose Make Compound Path.
- Press the keyboard shortcut Ctrl+8 (Windows) or Cmd+8 (Mac) as a faster alternative to the menu path.
Two visible changes confirm the compound path exists. First, any overlapping areas between the original shapes turn transparent immediately. Second, the Layers panel collapses the separate paths into one listing — you can no longer expand individual components the way you can with a group.
One limitation catches new users: Illustrator grays out the Compound Path command for live, editable text. Convert text to outlines first with Type > Create Outlines, or the shortcut Ctrl+Shift+O (Cmd+Shift+O on Mac), before combining letterforms into a compound path.
How Do You Release a Compound Path in Illustrator?
You release a compound path in Illustrator by selecting it, then choosing Object > Compound Path > Release, or pressing Alt+Shift+Ctrl+8 (Option+Shift+Cmd+8 on Mac). Illustrator breaks the object back into separate paths, and each path loses its shared fill and stroke.
- Select the compound path with the Selection tool.
- Choose Object > Compound Path > Release, or use the keyboard shortcut Alt+Shift+Ctrl+8 (Option+Shift+Cmd+8 on Mac).
- Check the Layers panel — the single compound-path entry splits back into its original separate paths.
Releasing removes every hole the compound path created. The transparent overlap area disappears, and the paths that formed it become independent, filled shapes stacked on top of each other again.
Releasing solves a specific problem: editing one subpath’s shape, color, or effect without disturbing the rest of the object. Since a compound path shares one fill, stroke, and appearance across all its subpaths, releasing is the only way to give each piece its own attributes again.
Appearance changes after release because the compound path’s shared attributes came from the bottommost object in the original stack. Once released, each path reverts to displaying its own fill and stroke, which can look different from what you saw while the paths were combined.
Compound Path vs. Other Illustrator Objects
Compound Path vs. Group
A group and a compound path both let multiple objects act as one unit for selection, movement, and transformation, but they diverge on individuality and holes. A group keeps every object fully independent each retains its own fill, stroke, and appearance, and you can ungroup it at any time to restore the originals exactly as they were.
A compound path merges the underlying path data itself. The subpaths share one set of appearance attributes, and overlapping regions cut transparent holes a behavior a group never produces, no matter how the objects overlap.
Compound Path vs. Compound Shape
A compound path and a compound shape both combine multiple paths into a single visual result, but they differ in how destructive and editable that combination is.
| Feature | Compound Path | Compound Shape |
| Combines paths | Yes | Yes |
| Creates holes | Yes, through fill-rule overlap | Yes, through Pathfinder modes (Exclude, Intersect) |
| Built with | Object > Compound Path > Make | Pathfinder panel, Alt/Option-click a mode button |
| Layers panel result | One single, flattened layer | One object, with original shapes preserved as live components |
| Editability | Limited — release to edit subpaths separately | High — modes stay live and adjustable after creation |
| Destructiveness | More destructive; harder to reverse cleanly | Less destructive; original shapes remain accessible |
| Best for | Final vector geometry, masks, outlined type | Complex construction that still needs editing later |
A compound shape lives inside the Pathfinder panel’s live workflow. Holding Alt (Option on Mac) while clicking a Pathfinder mode — Unite, Minus Front, Intersect, or Exclude — produces a compound shape instead of a permanent result, keeping the original component shapes editable underneath.
What Are the Common Use Cases for Compound Paths?
Compound paths solve five common design problems: cutting holes, building logos, creating outlined typography with counters, constructing multi-shape clipping masks, and combining complex vector artwork into one manageable object. Each use case relies on the same fill-rule and hole-creation mechanics.
- Create holes in solid shapes. Combine an outer circle and a smaller inner circle into one compound path, and the inner circle cuts a transparent hole through the middle the standard donut example used to teach the feature.
- Build logos with transparent areas. Combine the letters, icons, or shapes of a logo into one compound path when the design calls for negative space such as an arrow or gap cut through the mark itself.
- Outline typography with counters. Letters like O, A, P, B, and R contain enclosed counters. Converting text to outlines and combining the letterforms preserves those counters as true holes instead of solid infill.
- Construct multi-boundary clipping masks. A single clipping mask can only use one top object by default. Combining several shapes into a compound path first lets that mask contain multiple separate boundary areas at once.
- Simplify complex vector artwork. Combining many separate paths that should always move, scale, and export together reduces file complexity and keeps related geometry behaving as one manageable object.
Fill rules, path direction, and the Make and Release commands are the same three mechanics behind every use case above. Learn those three once, and holes, logos, outlined type, and clipping masks all become predictable instead of accidental.
How do you make a compound path in Illustrator?
Select the paths you want to combine, then go to Object → Compound Path → Make. You can also use the keyboard shortcut Ctrl+8 on Windows or Command+8 on Mac. Illustrator combines the selected paths into a single compound path, allowing areas such as the inside of a shape to become transparent holes.
Why can’t I make a compound path in Illustrator?
If Make Compound Path is unavailable or does not work as expected, check that you have selected two or more compatible vector paths. Text, groups, clipping masks, or objects with certain appearances may need to be converted or released first. Also check whether the objects are actually paths and not separate grouped objects.
How do you release or separate a compound path in Illustrator?
Select the compound path and choose Object → Compound Path → Release. This separates the compound path back into its individual paths. If you need to edit the original shapes independently, releasing the compound path can make that easier.
What is the difference between a path and a compound path in Illustrator?
A regular path is a single vector path, while a compound path combines two or more sub-paths into one path object. Compound paths are especially useful when you need holes or transparent areas inside a shape, such as the center of a doughnut or the counters in outlined letters.
Why isn’t the hole or transparent area showing in my compound path?
The result can depend on the fill rule, path direction, and how the paths overlap. If the expected hole is filled instead, check the compound path’s fill rule and path direction. You can also try changing the fill rule or reversing the direction of a sub-path to produce the intended transparent area.
What is the difference between a compound path and a compound shape in Illustrator?
A compound path combines paths into one path structure and is commonly used to create holes and cutouts. A compound shape is a more flexible, editable shape construction. Compound paths can be useful for final vector artwork, while compound shapes are often preferable when you want to preserve more flexibility while editing the component shapes.