
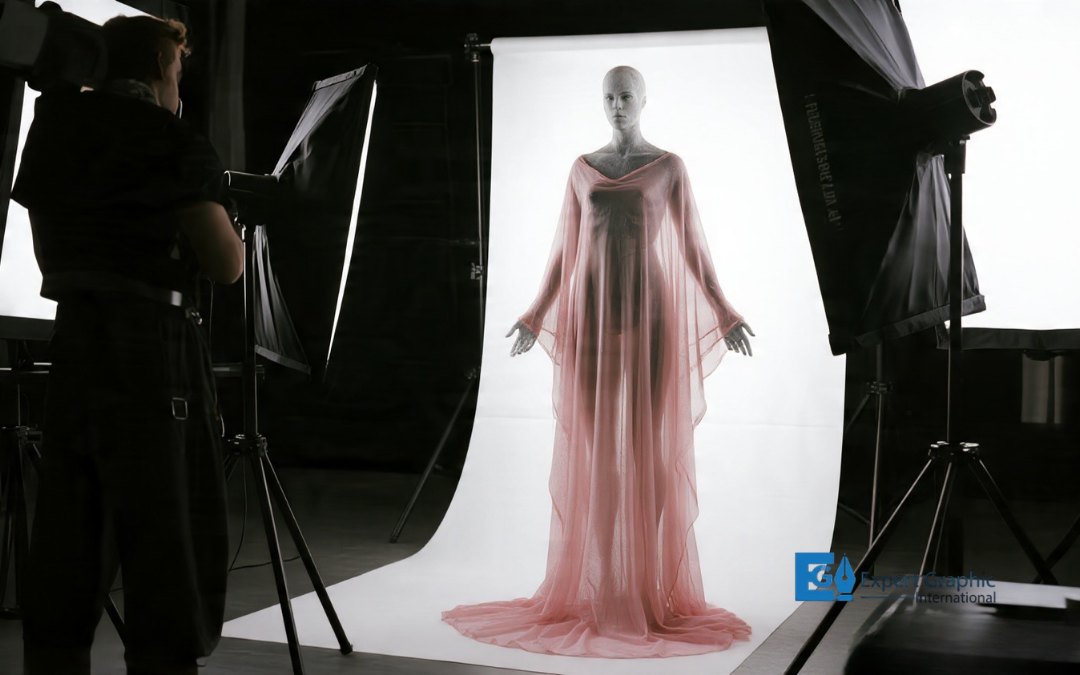
Ghost mannequin photography shoots a garment on a mannequin, then removes the mannequin in editing. The result is a hollow, 3D garment that shows collar, sleeves, and hem shape, drape, and fit without any visible body or model.
Online shoppers cannot touch fabric or try on a fit. Your product photo carries that entire job. Ghost mannequin photography, also called invisible mannequin or hollow man photography, gives shoppers the shape data they need to buy with confidence. This guide covers the technique itself, the gear list, the shooting and editing steps, how it stacks up against flat lay, on-model, and AI photography, which garments it suits, and what it actually costs.
What is ghost mannequin photography?
Ghost mannequin photography is a post-production technique where you photograph a garment on a mannequin, then digitally erase the mannequin in software like Photoshop. The finished image shows the garment holding its shape and volume, as if worn by an invisible person, with the collar, sleeves, and interior lining fully visible.
The name comes from the finished look, not the gear. You still use a real, physical mannequin during the shoot. The “ghost” part happens entirely in editing, when a retoucher removes the mannequin’s arms, neck block, and torso and fills the gap with a second photo of the garment’s interior.
Two other names describe the exact same technique: invisible mannequin photography and hollow man photography. All three terms point to one process: shoot on a form, edit the form out, keep the shape.
Large apparel retailers such as ASOS and Zara use this method across most of their catalog because it standardizes how a garment reads on a product page. A shopper sees the same lighting, the same angle, and the same shape logic on every listing, which builds trust in the brand’s sizing and presentation.
Ghost mannequin photography differs from a flat lay in one key way: it keeps the garment’s three-dimensional form. A flat lay shows a shirt lying on a table. A ghost mannequin shot shows that same shirt holding its shoulders, chest, and sleeve shape exactly as a body would fill it.
Why do fashion brands use ghost mannequin photography?
Fashion brands use ghost mannequin photography because it shows true garment shape and fit, cuts photography costs against model shoots, and keeps an entire catalog visually consistent. Shoppers who cannot try on a product rely on these cues to decide whether an item fits before they buy.
Here are the 7 main reasons apparel brands choose this method:
- Show accurate fit and drape: The mannequin’s 3D form reveals how a collar sits, how a waist narrows, and how sleeves fall, details a flat lay cannot communicate.
- Cut model costs: Live models charge $50 to $250 per hour plus hair, makeup, and styling fees. A mannequin shoot skips all of that overhead.
- Reduce return rates: Shoppers who see accurate shape and construction before buying report fewer sizing surprises at delivery, which lowers costly reverse-logistics volume.
- Build catalog consistency: Every SKU gets the same lighting, angle, and background, so a 500-item catalog reads as one cohesive brand instead of a patchwork of shoots.
- Reveal construction details: Interior shots expose stitching, lining, and inner collar labels that matter to shoppers buying tailored or premium garments.
- Scale faster than model photography: One mannequin session replaces the scheduling, hair, makeup, and coordination a live-model shoot demands, so brands move more SKUs per day.
- Meet marketplace requirements: Platforms including Amazon and Zalando specify consistent framing and clean backgrounds; ghost mannequin images satisfy that spec by default.
What equipment do you need for professional ghost mannequin photography?
You need a manual-control DSLR or mirrorless camera, a 50-85mm prime lens, a sturdy tripod, a modular mannequin with removable parts, two softbox lights, a white seamless backdrop, and photo-editing software. This core kit produces publication-ready results for most garment types.
- Camera: any DSLR or mirrorless body with full manual control over aperture, shutter speed, and ISO. A 20-megapixel sensor or higher captures fabric texture and stitching detail.
- Lens: a 50mm or 85mm prime lens. This focal range avoids the barrel distortion that wide lenses cause, which makes garments look tapered or stretched.
- Tripod: a sturdy tripod that locks your framing between the exterior shot and the interior shot. Any camera movement between shots breaks the composite.
- Mannequin: a modular form with detachable neck, arm, and torso sections in matte white or light gray. Matte finishes avoid reflections that complicate masking.
- Lighting: two softbox lights placed at roughly 45-degree angles on each side of the mannequin, plus an optional third light behind the backdrop to erase shadows on the seamless paper.
- Backdrop: a white seamless paper or fabric roll. A clean, even backdrop speeds up background removal in editing.
- Styling tools: clips, pins, double-sided tape, a steamer, and a lint roller to remove wrinkles and secure loose fabric before the shoot.
- Editing software: Adobe Photoshop remains the industry standard for layer masking and compositing; free alternatives like GIMP or Photopea handle basic edits.
Recommended camera settings stay consistent across the whole session: manual mode, aperture between f/8 and f/11 for edge-to-edge sharpness, ISO 100 to 200 to minimize noise, and a fixed white balance instead of auto, since auto white balance shifts color between shots.
How do you create ghost mannequin images step by step?
You prep the garment, shoot the exterior and interior views on a mannequin, then combine both images in Photoshop by masking out the mannequin and blending the interior shot into the gap. A single image typically takes 15 to 30 minutes from capture to finished export.
- Steam or iron the garment: Remove every wrinkle before it touches the mannequin. Wrinkles photograph as dark creases that are far harder to fix in editing than to prevent on set.
- Dress the mannequin: Align the collar, straighten the shoulders, and pin loose fabric at the back where the camera will not see it.
- Set up lighting and camera: Position the two softboxes at 45-degree angles, lock the tripod, and dial in manual exposure settings.
- Shoot the front view: Capture the garment straight-on, level with the chest for tops or the hip for bottoms.
- Shoot the back view: Rotate the mannequin 180 degrees without moving the camera or lights.
- Shoot the interior view: Remove the mannequin’s neck or arm pieces and photograph the inner collar, lining, and waistband. This shot fills the hollow space left after the mannequin disappears.
- Import both images into Photoshop: Open the exterior shot and the interior shot as separate layers.
- Mask out the mannequin: Use the Pen Tool to trace a precise path around the garment and convert it into a selection.
- Blend the interior layer: Position the interior shot beneath the exterior layer so it fills the neckline and sleeve gaps, then feather the mask edges for a seamless transition.
- Add shadow and color correction: Apply subtle shadows for depth, then correct color and export as a web-ready JPEG or a high-resolution TIFF for your archive.
Brands that skip Photoshop entirely can use AI ghost mannequin tools that generate the same effect from one flat lay photo in under a minute, though results vary on complex garments like sheer fabric or heavy layering.
Which photography method is best: ghost mannequin, flat lay, on-model, or AI?
No single method wins for every product; ghost mannequin photography suits structured garments and product pages, flat lay suits collection views and social content, on-model suits campaigns and lifestyle marketing, and AI suits high-volume catalogs on a tight budget. The right choice depends on garment type, budget, and sales channel.
| Method | Best for | Strength | Limitation |
| Ghost mannequin | Blazers, shirts, dresses, jackets, denim | Shows true 3D shape and fit | Needs a studio, mannequin, and editing skill |
| Flat lay | Basics, accessories, folded knits, social posts | Fast, cheap, minimal editing | Flattens shape; hides fit and drape |
| On-model | Campaigns, lookbooks, activewear, flowing fabric | Shows movement and human context | Model fees, scheduling, inconsistent results across shoots |
| AI-generated | High-SKU catalogs, long-tail products | Fastest, cheapest, no studio needed | Struggles with sheer fabric, complex layering, fine texture |
Use ghost mannequin photography as your default product-page image for structured apparel. Add flat lay shots for detail close-ups or social feeds. Reserve on-model photography for hero styles, campaigns, and garments that depend on movement, such as flowing dresses or activewear. Layer in AI tools when you need to process hundreds of long-tail SKUs fast without a full studio pipeline.
Most established apparel brands do not pick one method exclusively. They combine ghost mannequin for the main product-detail-page image, flat lay for quick collection browsing, and on-model for a handful of hero pieces per season.
Which types of clothing benefit most from ghost mannequin photography?
Structured garments that hold their own shape benefit most: blazers, button-down shirts, tailored dresses, denim, coats, and jackets. Loose, flowing, or sheer fabrics fight the technique and usually look better on a model or in a styled flat lay.
Garments that work well:
- Blazers and structured jackets: Firm shoulders and lapels hold shape on the mannequin with minimal pinning.
- Button-down shirts: Collars, cuffs, and plackets photograph cleanly and composite easily.
- Tailored dresses: A fitted bodice keeps its form, though a full-body mannequin works better than a torso for this category.
- Denim and trousers: A lower-body mannequin form captures pocket placement and leg shape accurately.
- Coats and outerwear: Heavier fabric holds volume well, making the floating effect look natural and premium.
- Sweaters and knitwear: Tissue paper stuffed into the shoulders and chest prevents thin knits from looking deflated.
Garments that struggle with this technique:
- Sheer or mesh fabrics: Chiffon and lace reveal the mannequin underneath, which breaks the illusion.
- Heavily draped or flowing pieces: Maxi skirts, capes, and kimonos rely on movement and gravity that a static mannequin cannot replicate.
- Activewear: Leggings and performance gear need to show stretch and motion, which on-model action shots capture far better.
- Very small accessories: Belts, socks, and jewelry rarely justify the multi-shot compositing workflow.
For these harder categories, flat lay, styled hanger shots, or on-model photography typically produce a more accurate and appealing result.
Should you handle ghost mannequin editing in-house, outsource it, or use AI?
Small catalogs with fewer than 50 SKUs often do the editing in-house; growing brands with hundreds of SKUs typically outsource or use AI tools for cost and speed; premium brands with complex garments keep tight, in-house or studio-level control. The right choice depends on catalog size, budget, and quality bar.
- In-house editing: gives you full control over brand-specific styling, immediate feedback, and long-term savings once you pass a high enough volume to justify a trained editor’s salary. It costs more per image at low volume and demands real Photoshop skill, with in-house editors averaging 10 to 15 minutes per image.
- Outsourcing: hands the work to specialist studios that already know neck-joint and sleeve-joint compositing. Rates run from roughly $0.50 to $8 per image depending on garment complexity, with 24- to 72-hour turnaround. It saves internal hours but introduces communication overhead and a dependency on an external partner’s queue.
- AI-powered tools: generate a ghost mannequin image from a single flat lay photo in under a minute, at roughly $0.15 to $5 per image on most platforms. AI handles standard garments like t-shirts and basic button-downs close to manual quality, but it still struggles with sheer fabric, complex necklines, and fine texture on silk or satin.
A hybrid workflow works best for most growing brands: shoot in a consistent studio setup, automate the bulk of straightforward garments through AI, and route complex or hero pieces to a human retoucher for final polish. This keeps per-image cost low while protecting quality on the images that matter most.
How much does ghost mannequin photography cost and is it worth the investment?
Traditional studio ghost mannequin photography runs $15 to $75 per finished image, outsourced editing alone runs $0.50 to $8 per image, and AI-generated ghost mannequin images run roughly $0.15 to $5 per image. DIY editing costs little beyond your time and equipment but takes 15 to 60 minutes per garment.
Cost breakdown by approach:
- Full-service studio shoot and edit: $25 to $75 or more per image, no in-house skill required.
- DIY shoot with your own editing: effectively $0 to $5 per image once you own the gear, but 15 to 60 minutes of your time per garment.
- Outsourced editing only (you shoot, a studio edits): $0.50 to $8 per image for simple garments, up to $7 for complex multi-joint composites, with 24- to 72-hour turnaround.
- AI ghost mannequin tools: $0.15 to $5 per image, delivered in seconds to minutes, best for standard garment shapes at high volume.
Is it worth the investment? For any brand selling structured apparel online, yes. Clean, consistent product images correlate with higher conversion rates and fewer returns, since shoppers see accurate shape and fit before they buy. A brand moving 200 SKUs a season pays roughly $3,000 to $15,000 for full studio production, or a small fraction of that through an AI or hybrid workflow, against a real, measurable lift in trust and click-through on every product page.
Start small. Test one photography method against your actual conversion data before you commit your whole catalog to it. Your product photo is doing the job of a fitting room, so give it the shape, the detail, and the consistency your shoppers are counting on.
Is a ghost mannequin the same as an invisible mannequin?
Ghost mannequin and invisible mannequin name the same technique: photographers shoot a garment on a mannequin, then remove the mannequin in post-production. The result carries additional names hollow man effect and 3D mannequin effect. Ghost mannequin dominates industry usage, while invisible mannequin appears more in customer-facing marketing copy across e-commerce platforms.
Which mannequin works best?
Seamless torso mannequins with removable neck, arm, and chest sections work best for ghost mannequin photography. Torso-only forms suit shirts, blazers, and cardigans; leg forms suit pants and jeans; full-body forms suit dresses. Matte white premium models add extra V-shaped neck pieces for diverse collar types, per PhotoRobot’s ghost mannequin selection guide.
How long does editing take ghost mannequin photography?
Manual ghost mannequin editing takes 15 to 45 minutes per image, depending on garment complexity, according to Rewarx’s 2026 speed comparison. Experienced editors finish simple garments in 5 to 10 minutes; beginners require 20 to 60 minutes. AI tools cut this to 3 to 4 minutes per image, including quality review and export.
Does ghost mannequin photography increase sales?
Ghost mannequin photography increases conversion rates by 20 to 40 percent, according to Pixel Retouching’s ecommerce guide. The technique reduces returns by clarifying fit and drape, builds brand trust through consistent presentation, and outperforms flat-lay images for structured garments like blazers, coats, and knitwear across virtually every apparel category tested.
Can AI automate the process of ghost mannequin photography?
AI automates ghost mannequin photography completely, per WearView’s product documentation. Tools like Photoroom, Snappyit, and huhu.ai remove mannequins, reconstruct collars and inner linings, and generate the floating-garment effect from one flat-lay photo in under 60 seconds. This process eliminates physical mannequins, studio setups, and manual Photoshop compositing entirely.
Can beginners do ghost mannequin photography?
Beginners can do ghost mannequin photography, though the traditional Photoshop method requires 20 to 60 minutes per image compared to 5 to 10 minutes for experienced editors, per Pixc Retouch’s editing guide. Skill develops after 10 to 20 practice images. AI tools remove the editing barrier entirely, letting beginners generate results in under a minute.
Is Photoshop required for ghost mannequin photography?
Photoshop is not required for ghost mannequin photography; AI tools like Photoroom, Shotova, and Snappyit generate the same floating-garment effect from a single upload without software or editing skill. Traditional workflows still use Photoshop for layer masking, clipping paths, and neck-joint compositing, with GIMP and Affinity Photo as budget alternatives for manual editing.